View streaming data resources #
The Data ingest pane provides an overview of your data sources, live tables, and schema registries, organized into their respective tabs.
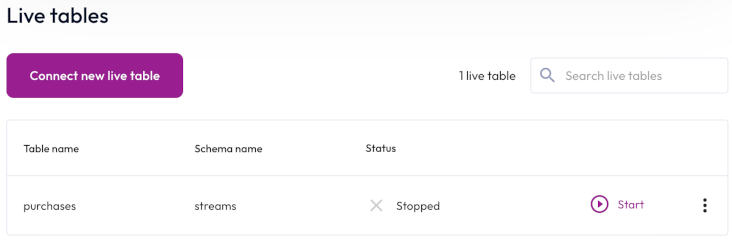
View live tables #
All live tables appear on the Tables tab. The details are displayed in the following columns:
- Table name: The name of the table.
- Status: The status of the live table.
- Catalog: The name of the catalog.
- Schema: The name of the schema.
- Source: The icon representing the data source.
The total number of tables appears next to the search field and also reflects the number of results returned according your search criteria. By default, Starburst Galaxy limits an account to five live tables and 120 MB/s of total throughput. To increase your quota limit, contact Starburst Support.
View All tables or narrow the live tables list to view only Raw tables or Transform tables.
Start and stop ingestion #
Stopping data ingestion for longer than your data retention threshold results in data ingestion starting from the earliest point in the Kafka topic to include missed messages. To prevent missed messages, resume data ingestion before you hit your Kafka retention threshold or choose a longer data retention threshold.
Stop prevents data from being ingested into the live table. Start resumes ingestion from where it left off.
Live table options menus #
The following options menu selections are available for all live tables:
- Edit configurations to change configuration settings.
- Delete live table to decommision.
Additional selections for transform tables include:
- Update schema to make changes to the schema. This option is only availabale for tables containing JSON data.
- Rewind to savepoint to restore the table to a previous state. See the rewind table to savepoint and backfill instructions in Update schema.
Raw table options #
Here, you can create a transform table at any time. Click Create transform table, and follow the steps in Create a transform table and schematize data.
Transform table options #
You can query a transform table by clicking Query table. This action opens
the query editor with a prepared SELECT statement you can run.
Create a live table #
To create a live table, click Create live table, then choose one of the following options in the Source section:
- To create a new raw table:
- Select Create a new raw table, then choose a source from the drop-down menu.
- Click Next, then follow the steps in Land your data in a raw table.
- To create a new transform table:
- Select Create a new transform table, then choose a raw table from the drop-down menu.
- Follow the steps in Create a transform table and schematize data.
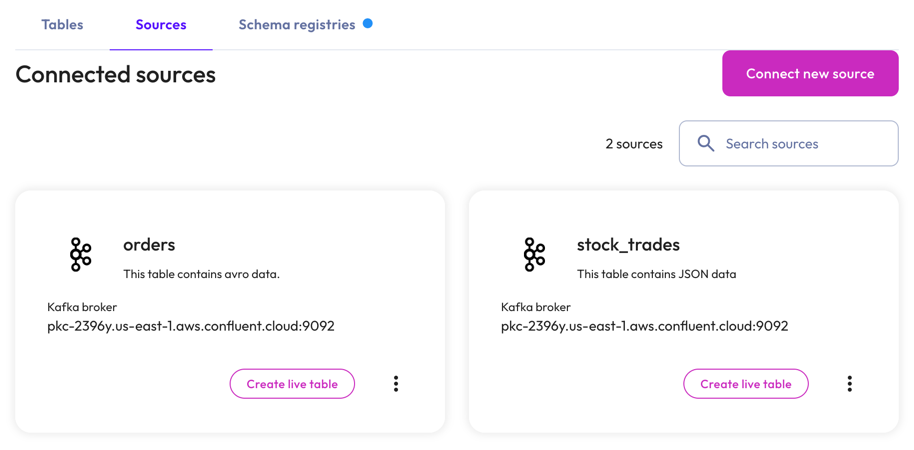
View connected sources #
All connected data sources appear on the Sources tab in the order they were created.
Each source card shows the name of the ingest source, the description, and the Kafka broker. Use the Search field to find connected sources by name.
To create a new raw table or a new transform table from here, click Create live table.
Use themore_vertoptions menu to manage the ingest source.
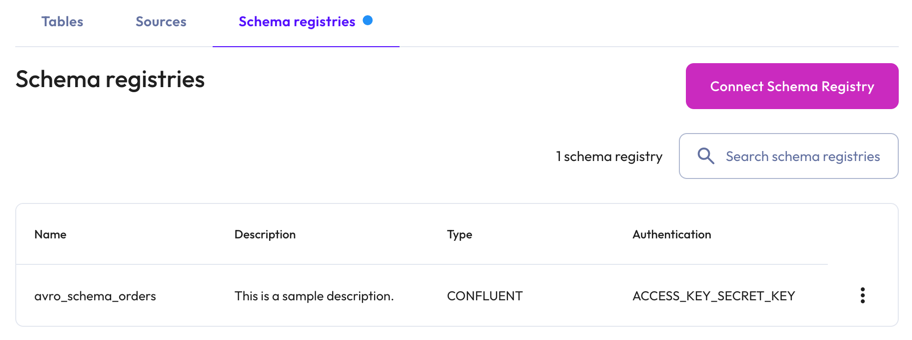
View schema registries #
The schema registries tab organizes the list of schema registries in the following columns:
- Name: The name of the schema registry.
- Description: The description of the schema registry.
- Type: The Kafka data source.
- Authentication: The authentication method used.
Use the Search field to find schema registries by name.
Themore_vertoptions menu at the end of each row in the list lets you delete the schema registry.
To connect a new schema registry to the table, click Connect schema registry.
Is the information on this page helpful?
Yes
No