Black Hole catalog #
The Black Hole catalog is designed for high performance testing of other
components. It works like the /dev/null device on Unix-like operating systems
for data writing and like /dev/null or /dev/zero for data reading. However,
it also has features that allow you to test in a more controlled manner.
Metadata for any tables created in this catalog is kept in memory on the
coordinator, and is then discarded when the cluster restarts. Created tables are
by default always empty, and any data written to them is ignored. Data reads
return no rows.
To use this catalog, use CREATE SCHEMA normally, then CREATE TABLE or CREATE
TABLE AS SELECT. Created schemas and tables do not display in the query editor’s
cluster explorer or the catalog
explorer, but can still be queried
with their full or relative path names. A Black Hole catalog shows only two
schemas named default and the usual information_schema, but these do not
contain created table data.
During table creation, a desired number of rows can be specified. In such cases, writes behave in the same way, but reads always return the specified number of some constant rows. Do not rely on the content of such rows.
Create a catalog #
Follow these steps to create a catalog for Black Hole:
- In the navigation menu, select Data, then Catalogs.
- Click Create catalog.
- On the Create a catalog pane, click the Black Hole icon.

The following sections provide more detail for creating Black Hole catalog connections.
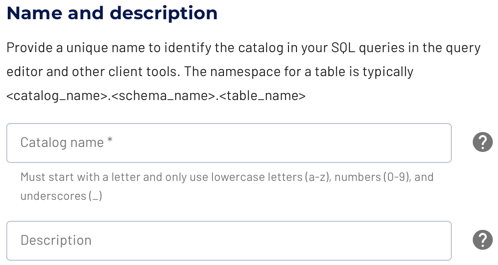
Define catalog name and description #
The Catalog name is used to identify the catalog when writing SQL or showing the catalog in client applications.
The name is displayed in the query editor or other client applications, and in
the output of a SHOW CATALOGS
command. It is used to fully qualify the name of any table in SQL queries
following the catalogname.schemaname.tablename syntax. For example, you can
run the following query in the sample cluster without first setting the catalog
or schema context: SELECT * FROM blackhole.calcutta.gaol;.
The Description is a short, optional paragraph that provides further details about the catalog. It appears in the Starburst Galaxy user interface and can help other users determine what tests can be run using the catalog.
Connect catalog #
Click Connect catalog, and proceed to set permissions where you can grant access to certain roles.
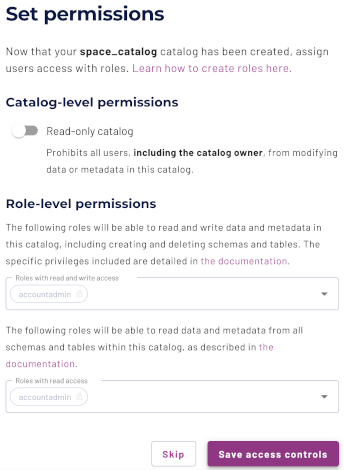
Set permissions #
This optional step allows you to configure read-only access or full read and write access to the catalog.
Use the following steps to assign read-only access to all roles:
- Select the Read-only catalog switch to grant a set of roles read-only access to the catalog’s schemas, tables, and views.
- Next, use the drop-down menu in the Role-level permissions section to specify the roles that have read-only access.
- Click Save access controls.
You can specify read-only access and read-write access separately for different sets of roles. That is, one set of roles can get full read and write access to all schemas, tables, and views in the catalog, while another set of roles gets read-only access.
Use the following steps to assign read/write access to some or all roles:
- Leave the Read-only catalog switch cleared.
- In the Role-level permissions section:
- Expand the drop-down menu in the Roles with read and write access field and select one or more roles to grant read and write access to.
- Expand the drop-down menu in the Roles with read access field and select one or more roles from the list to grant read-only access to.
- Click Save access controls.
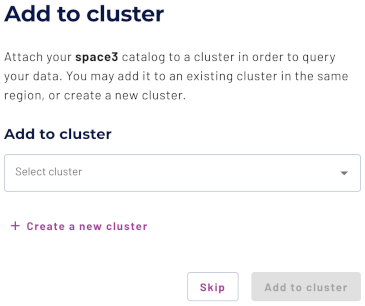
Add to cluster #
You can add your catalog to a cluster later by editing a cluster. Click Skip to proceed to the catalogs page.
Use the following steps to add your catalog to an existing cluster or create a new cluster in the same cloud region:
- In the Add to cluster section, expand the menu in the Select cluster field.
- Select one or more existing clusters from the drop down menu.
- Click Create a new cluster to create a new cluster in the same region, and add it to the cluster selection menu.
-
Click Add to cluster to view your new catalog’s configuration.
Schemas and tables in Black Hole catalogs do not appear in the query editor’s
navigation or in catalog explorer. Use the query editor to create and view
schemas and tables with CREATE SCHEMA, CREATE TABLE, VIEW SCHEMAS and
VIEW TABLES. Results remain readable for ###
SQL support #
The Black Hole catalog supports the following SQL features:
- Globally available statements
- Read operations
- Write operations:
- Data Management:
- Schema and table management:
- View management:
Is the information on this page helpful?
Yes
No