Unity catalog #
Use a Unity catalog to configure access to external and managed tables, as well as Unity Catalog-managed tables with catalog-managed commits, stored on Amazon S3, Azure Data Lake Storage, and Google Cloud Storage.
The Unity catalog supports a subset of operations across managed, external, and Unity Catalog-managed tables with catalog-managed commits. The following operations are supported:
| Supported for | Operation | Notes |
|---|---|---|
| External tables | CREATE TABLE, INSERT, UPDATE, MERGE, DELETE, DROP TABLE, READ |
To perform write operations on external tables with Unity Catalog, you must meet Databricks’ requirements for external access. |
| Managed tables | READ |
Managed tables are read-only. |
| Unity Catalog-managed tables with catalog-managed commits | INSERT, UPDATE, MERGE, DELETE, DROP, READ |
A Unity Catalog-managed table with catalog-managed commits is a type of managed table specific to Unity and created in Databricks. These tables are in Beta release status in Databricks and may change without notice. You must contact Databricks for access to this feature, and you must contact your Starburst account team to enable write access to these tables. |
TBLPROPERTIES (
  'delta.enableRowTracking' = 'false',
  'delta.checkpointPolicy' = 'classic'
)
Follow these steps to create a catalog for Unity:
- In the navigation menu, select Data, then Catalogs.
- Click Create catalog.
- On the Create a catalog pane, click the Unity icon.

- Configure the catalog as prompted in the dialog.
- Test the connection.
- Connect the catalog.
- Set any required permissions.
- Add the new catalog to a cluster.
The following sections provide more detail for creating Unity catalog connections.
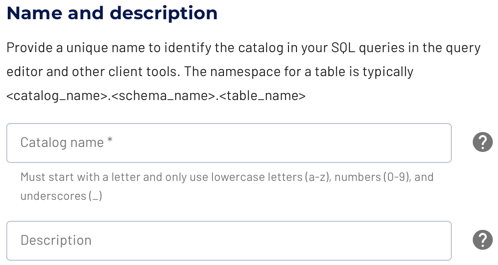
Define catalog name and description #
The Catalog name is visible in the query editor and other clients. It is used to identify the catalog when writing SQL or showing the catalog and its nested schemas and tables in client applications.
The name is displayed in the query editor, and in the output of a SHOW
CATALOGS command.
It is used to fully qualify the name of any table in SQL queries following the
catalogname.schemaname.tablename syntax. For example, you can run the
following query in the sample cluster without first setting the catalog or
schema context: SELECT * FROM tpch.sf1.nation;.
The Description is a short, optional paragraph that provides further details about the catalog. It appears in the Starburst Galaxy user interface and can help other users determine what data can be accessed with the catalog.
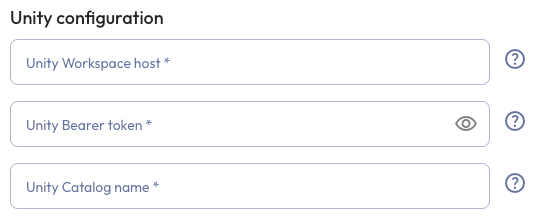
Unity configuration #
To configure the connection to your Unity catalog, provide the following details:
- Unity Workspace host: the name of the Databricks workspace host with Unity
Catalog enabled, without any https prefix, for example:
dbc-a1b2345c-d6e7.cloud.databricks.com - Unity Bearer token: the secret token used by the service principal to authenticate a connection to the Unity Catalog metastore. For more information about generating an on-behalf token for the service principal, see the Databricks documentation.
-
Unity Catalog name: the name of the Unity Catalog within the Databricks workspace.
Authentication to S3 #
To grant access to the object storage, select between Vended credentials, Cross account IAM role, or AWS access key.
If you select Vended credentials, Starburst Galaxy requests short-lived, temporary credentials from the Unity Catalog REST API at query time. Credentials are automatically refreshed and scoped to the table ID or external location in Unity Catalog.
To use Cross account IAM role, provide an alias for the role in Starburst Galaxy and the AWS IAM ARN.
To use AWS access key, provide the AWS access key for S3 and the AWS secret key for S3.
To learn about configuring these details in the AWS console, read External security in AWS.
Authentication to ADLS #
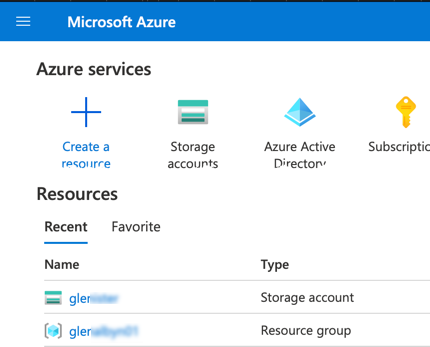
Provide an ADLS storage account name, which you can find in your list of Resources in the Azure services section when you log into the Azure portal.
Specify an authentication method that can grant access to that object storage account. Select between the following authentication methods:
-
Azure service principal: Select a service principal alias from the drop-down list of configured service principals. If you have not yet configured a service principal for this Galaxy account, click Configure an Azure service principal to do so now. Configure Azure service principals following the guidance in:
- Microsoft Azure
- The Service
principal
section of External security in
Azure
-
Azure access key: Provide the ABFS access key for the specified storage account. Obtain this access key as described in:
- The Azure access key section of of External security in Azure
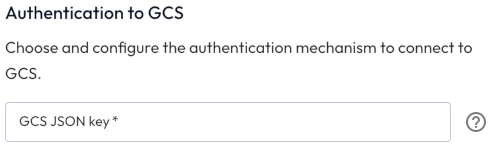
Authentication to GCS #
To grant access to the object storage, provide the GCS service key.
Create a JSON-formatted service account API key for your Google Cloud account.
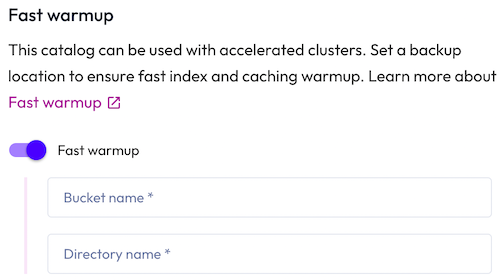
Fast warmup #
If you intend to connect the catalog to an accelerated cluster, Starburst Warp Speed optionally provides fast warmup.
To set a backup location in your object storage for index and data caches, enter a Bucket name and a Directory name within the bucket where the cache data is to be stored.
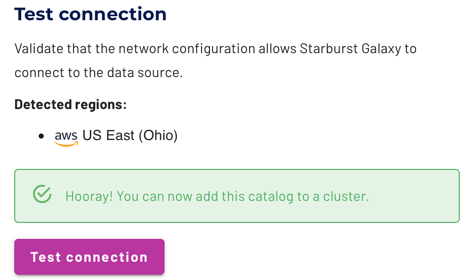
Test the connection #
Once you have configured the connection details, click Test connection to confirm data access is working. If the test is successful, you can then save the catalog.
If the test fails, look over your entries in the configuration fields, correct any errors, and try again. If the test continues to fail, Galaxy provides diagnostic information that you can use to fix the data source configuration in the cloud provider system.
Connect catalog #
Click Connect catalog, and proceed to set permissions where you can grant access to certain roles.
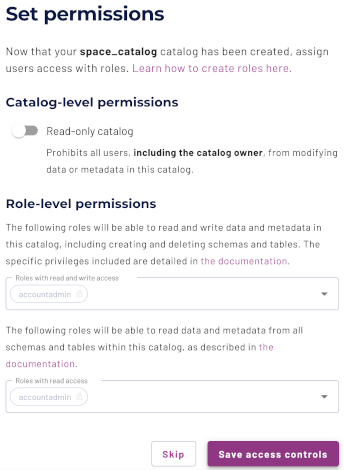
Set permissions #
This optional step allows you to configure read-only access or full read and write access to the catalog.
Use the following steps to assign read-only access to all roles:
- Select the Read-only catalog switch to grant a set of roles read-only access to the catalog’s schemas, tables, and views.
- Next, use the drop-down menu in the Role-level permissions section to specify the roles that have read-only access.
- Click Save access controls.
You can specify read-only access and read-write access separately for different sets of roles. That is, one set of roles can get full read and write access to all schemas, tables, and views in the catalog, while another set of roles gets read-only access.
Use the following steps to assign read/write access to some or all roles:
- Leave the Read-only catalog switch cleared.
- In the Role-level permissions section:
- Expand the drop-down menu in the Roles with read and write access field and select one or more roles to grant read and write access to.
- Expand the drop-down menu in the Roles with read access field and select one or more roles from the list to grant read-only access to.
- Click Save access controls.
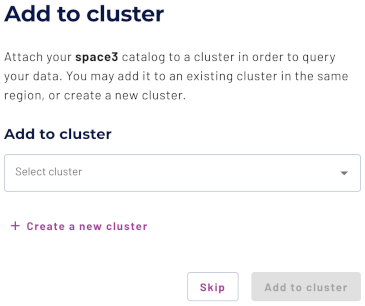
Add to cluster #
You can add your catalog to a cluster later by editing a cluster. Click Skip to proceed to the catalogs page.
Use the following steps to add your catalog to an existing cluster or create a new cluster in the same cloud region:
- In the Add to cluster section, expand the menu in the Select cluster field.
- Select one or more existing clusters from the drop down menu.
- Click Create a new cluster to create a new cluster in the same region, and add it to the cluster selection menu.
-
Click Add to cluster to view your new catalog’s configuration.
Is the information on this page helpful?
Yes
No