Explore clusters #
A cluster in Starburst Galaxy is a set of compute nodes that can be started and run to provide access to catalogs of data sources. The cluster provides the resources to run queries against multiple catalogs. You can access the data exposed by the catalogs with the query editor or with another supported client.
Cluster list #
To see the list of clusters in your Galaxy account, click Admin > Clusters on the navigation menu. Learn about exploring individual clusters from the cluster list as described on the clusters page.
Cluster explorer pane #
Explore the data entity contents of each available cluster using the cluster explorer pane, which is part of the query editor.
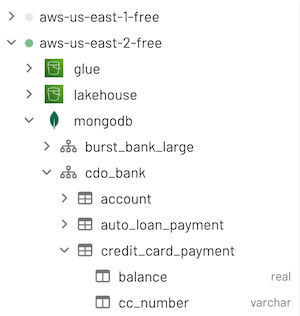
The cluster explorer pane shows an expandable, hierarchical diagram with the following symbols:
| clusters | cluster status symbol, listed below |
| catalogs | logo for this catalog's data source |
| schemas | hub symbol schema |
| tables | table symbol table |
| views | eye symbol visibility |
| columns | two-column table symbol bottom_sheets |
The cluster status symbols are:
| Solid radio_button_checked | Running |
| Pulsing radio_button_checked | Starting |
| Solid radio_button_checked | Suspended |
| Solid radio_button_checked | Stopped |
For short durations, you can also see the status Updating if you made an edit to a cluster’s configuration, such as changing its size or auto-suspend time.
Expand a cluster to see the cluster’s entities such as catalogs, schemas, tables, views, and materialized views regardless of the cluster’s status. Entities remain visible when the cluster is suspended.
To expand an element, click its chevron_right expander icon. To collapse an element, click its keyboard_arrow_down collapse icon.
Click a cluster’s name to collapse all catalogs under it. Similarly, click a catalog to collapse all schemas under it, and click a schema to collapse its table and view list.
Quick info dialogs #
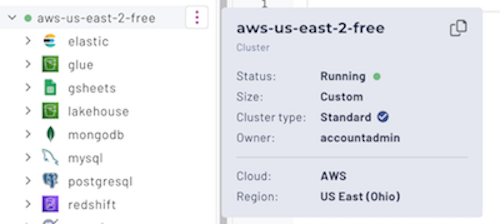
Click or hold the pointer over the name of a cluster in the cluster explorer to display an information dialog that shows the status, size, cluster type, owner, cloud, and region for the selected cluster. For example:
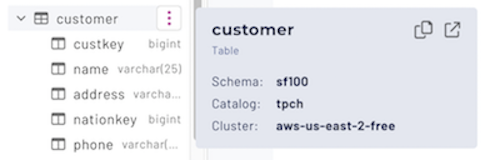
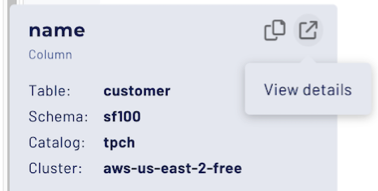
Click or hold the pointer over the name of a table in the cluster explorer to show the full path of the table, including cluster name. For example:
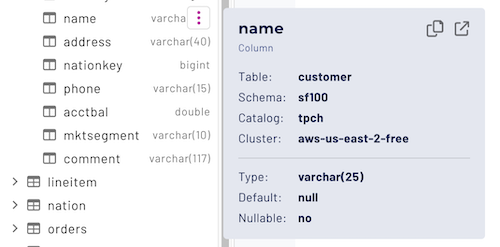
Click or hold the pointer over the name of a column in the cluster explorer to display a dialog that shows the type, the default value, and whether the data is nullable for the selected column. For example:
You can select and copy text within a quick info dialog. Click content_copy to copy the name or full path to a cluster object in the clipboard. Click open_in_new to open the cluster explorer page to see details about a specific cluster object. For example:
Options menus #
The cluster explorer displays an more_vert options menu on the right of an object’s name when you select or hold the pointer over its name. The selections in the options menu apply only to the current object. The following example shows the options menu for a table named “customer”:
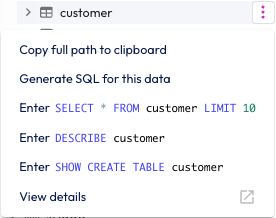
The following table shows the menu options provided by the options menus for cluster explorer objects.
catalog.schema.tablename
As shown in the following table, when the cluster explorer menu options return a path, each path element is wrapped in quotes. This takes into account possible spaces and special characters in those element names that may be supported by the current catalog.
For example: “catalog”.”schema”.”tablename”
| Object | more_vert menu options |
|---|---|
| Cluster |
|
| Catalog |
|
| Schema |
|
| Table |
|
| View | Same options as for a table, with the word view substituted. |
| Column |
|
Examine table parameters #
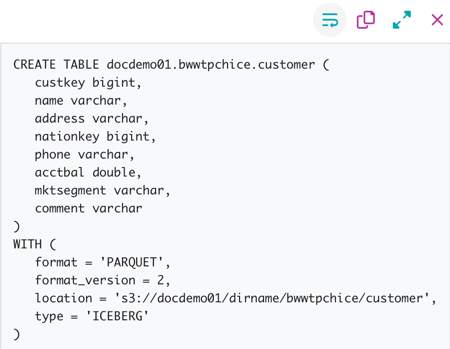
Use the SHOW CREATE TABLE statement to examine the structure of a table and
reveal its creation parameters. This is especially useful for tables in object
storage, where you may need to
see a table’s type and format.
The options more_vert menu for tables includes the SHOW CREATE TABLE statement for the current table. When run, the result appears in the results pane:
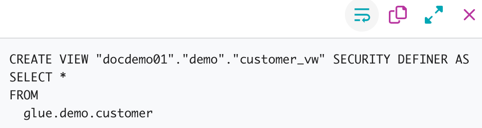
In the options menu for a view or materialized view,
invoke the SHOW CREATE VIEW statement. As with tables, click the long line
in the results pane to open a dialog that shows the CREATE VIEW parameters
for the current view. For example:
Is the information on this page helpful?
Yes
No