Configure a live table from Kafka #
This page walks you through configuring a live table in three steps:
- Step 1: Connect to a stream source
- Step 2: Land your data in a raw table
- Step 3: Create a transform table and schematize data
Getting started #
Review the guidelines on key configurations and see the prerequisites section for requirements.
Prerequisites #
Galaxy streaming ingest is supported on Amazon Web Services. To use the service, you must have:
- An AWS S3 bucket location for which you have read and write access.
- An AWS cross-account IAM role to allow access to the S3 bucket. For MSK, the cross-account IAM role must contain a policy with specific permissions. See an example of this policy.
- An S3 catalog configured to use cross-account IAM role credentials or an AWS access key ID and secret access key.
- An S3 catalog configured to use an AWS Glue metastore or a Starburst Galaxy metastore.
-
A Galaxy cluster located in one of the following AWS regions:
- us-east-1
- us-west-2
- ap-southeast-2
- eu-central-1
- eu-west1
To inquire about support for other regions, contact Starburst Support.
- A known working Kafka stream with at least one active topic.
- A Kafka topic with a minimum data retention threshold of seven days.
Starburst Galaxy supports streaming data from the following Kafka streaming services:
AWS PrivateLink is available for Apache Kafka and Confluent Cloud. Amazon MSK multi-VPC private connectivity is supported for Amazon MSK. To configure Galaxy to connect to your Kafka with private connectivity, contact Starburst Support.
Connect to a stream source #
To begin ingesting stream data, click Data > Data ingest in the navigation menu.
The Data ingest pane provides an overview of streaming resources, organized into Data sources, Live tables, and Schema registries tabs.
Click the Sources tab, then select a Kafka data source.
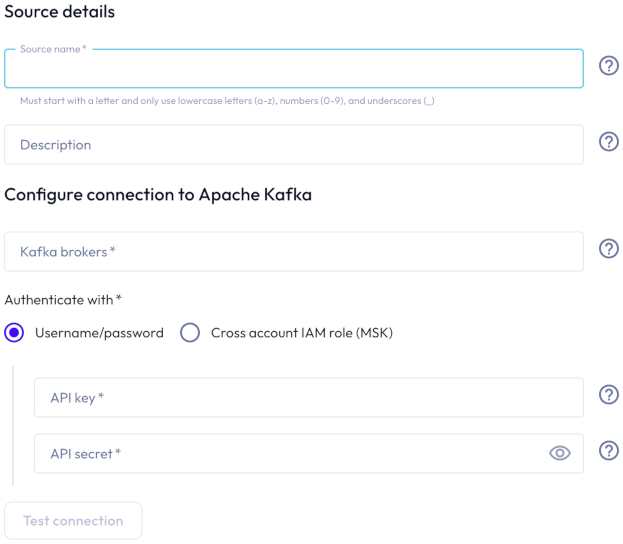
In the Connect new Kafka source dialog, provide the following details:
-
In the Source details section, enter a name for this stream source and a description.
-
In the Private link connectivity section:
- If the kafka cluster is secured with private link, click the toggle to enable a private connection.
- Select an AWS region from the drop-down menu.
-
In the Configure connection to Kafka section:
-
Enter one or more Kafka brokers as
host:port. Separate multiple brokers with a comma. - To authenticate with an API key/API secret pairing:
- Select SASL/PLAIN or a SASL/SCRAM mechanism option. SASL/SCRAM-SHA-256 and SASL/SCRAM-SHA-512 are supported.
- Enter an API key and an API secret in the respective fields.
- To authenticate with a cross-account IAM role:
- Select a cross-account IAM role from the drop-down menu.
- To configure a cross-account IAM role, click add Configure
a cross account IAM role.
-
-
Click Test connection to confirm that you have access to the stream. If the test fails, check your entries, correct any errors, and try again.
-
If the connection is successful, click Save new source.
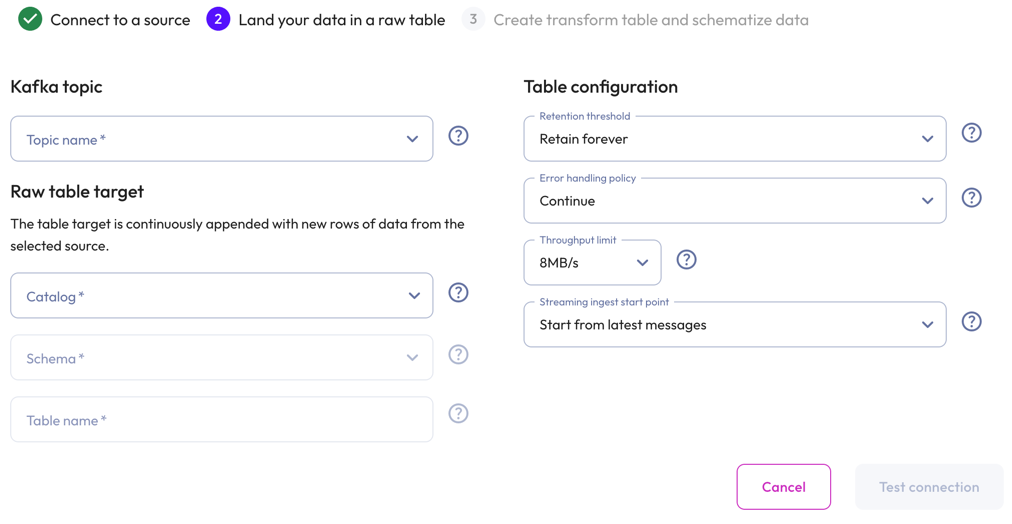
Land your data in a raw table #
-
In the Kafka topic section, select the Topic name from the drop-down menu.
-
In the Raw table target section:
- Select a Catalog and Schema from the respective drop-down menus.
- Provide a Table name and Description.
-
In the Table configuration section:
-
Set a data Retention threshold: By default, Retain forever is preselected to specify that all data is to be stored in the live table indefinitely. Select a different value to specify how long data is retained before it is automatically purged: 1 day, 7 days, 14 days, 30 days, or 90 days.
-
Choose an Error handling policy: Continue continues the ingestion process and writes any records that fail to parse to the errors table. Pause and notify stops the ingestion process if any parsing errors occur.
-
Set a Throughput limit per partition: 1MB/s, 2MB/s, 4MB/s, 8MB/s, or 16MB/s. By default, 8MB/s is preselected.
-
Select a Streaming ingest start point: Start from latest message streams new data. Start from earliest messages ingests existing data plus new data. New data is delayed until existing data is ingested.
-
-
Click Test connection to confirm that you have access to the data. If the test fails, check your entries, correct any errors, and try again.
-
If the connection is successful, click Save raw table.
Create a transform table and schematize data #
Transform your raw data into structured data, then define a schema for your data.
You can create a transform table now or later through the raw table options in Live Table Management.
To create a transform table now, proceed to Transform and schematize JSON data or Transform and schematize Avro data.
Transform JSON data #
To create a transform table for JSON data, select JSON.
-
In the Transform table target section:
- Select a Catalog and Schema from the respective drop-down menus.
- Provide a Table name and Description.
-
In the Table configuration section:
-
Set a data Retention threshold: By default, Retain forever is preselected to specify that all data is to be stored in the live table indefinitely. Select a different value to specify how long data is retained before it is automatically purged: 1 day, 7 days, 14 days, 30 days, or 90 days.
-
Choose an Error handling policy: Continue continues the ingestion process and writes any records that fail to parse to the errors table. Pause and notify stops the ingestion process if any parsing errors occur.
-
-
Click Validate data. If the test fails, check your entries, correct any errors, and try again.
-
Click Next.
Schematize JSON data #
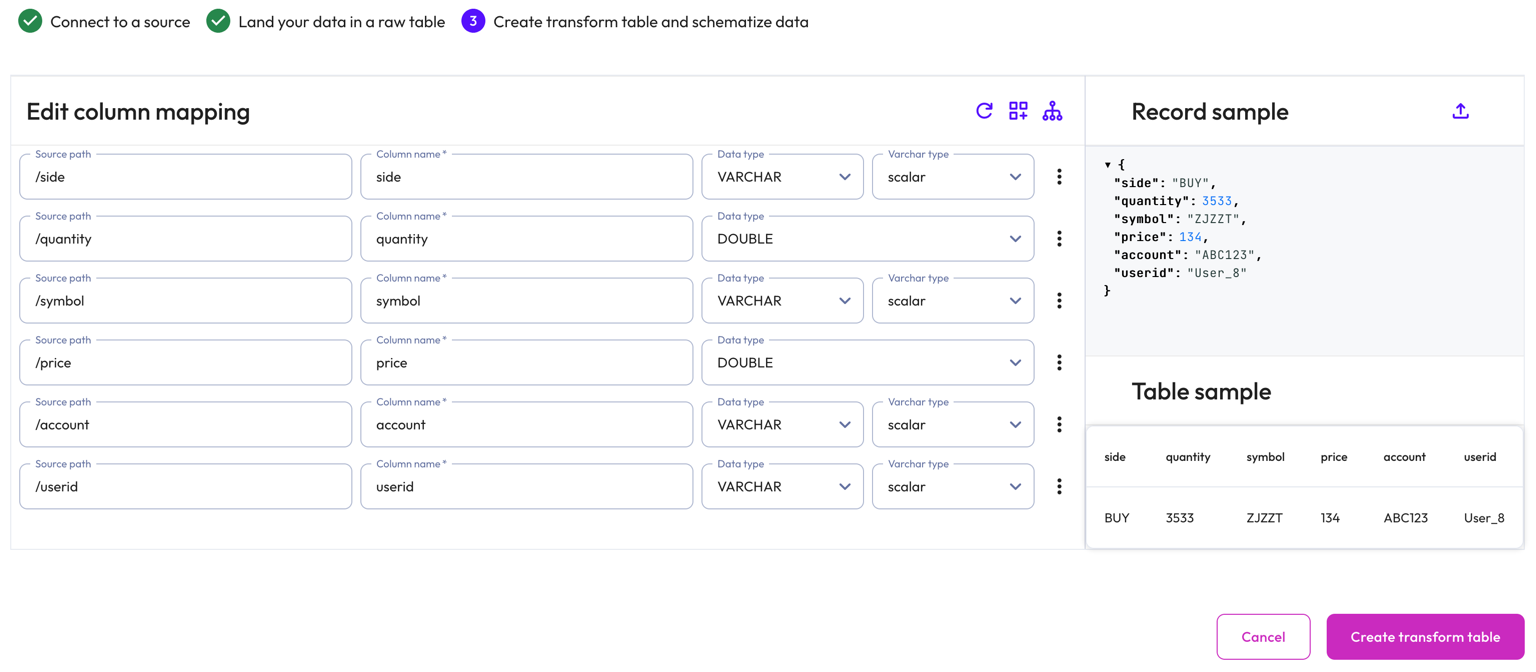
Starburst Galaxy automatically suggests a schema by inferring from the Kafka messages on the topic. Modify the inferred schema by changing field entries and adding and removing columns.
Use the Edit column mapping panel to map the following columns:
- Source path: The location of the record information within the JSON row.
- Column name: Provide a column name for the live table.
- Data type: Specify a data type for the live table column.
- Varchar type: For a
VARCHARtype, specify aSCALARor JSONVARCHARtype. ForTIMESTAMPandTIMESTAMP WITH TIMEZONEtypes, specify aiso601orunixtimetype.
Use themore_vertoptions menu at the end of each row to add or remove columns.
Perform the following actions from the header:
-
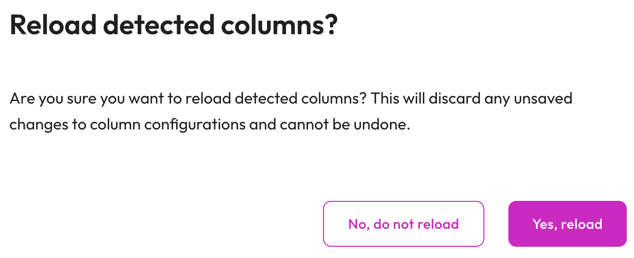
refresh Reload detected columns: Restore any altered field entries to the original inferred values.
- In the Reload detected columns dialog, click Yes, reload to reload detected columns and discard any unsaved changes to column configurations. This action cannot be undone. Otherwise, click No, do not reload.
-
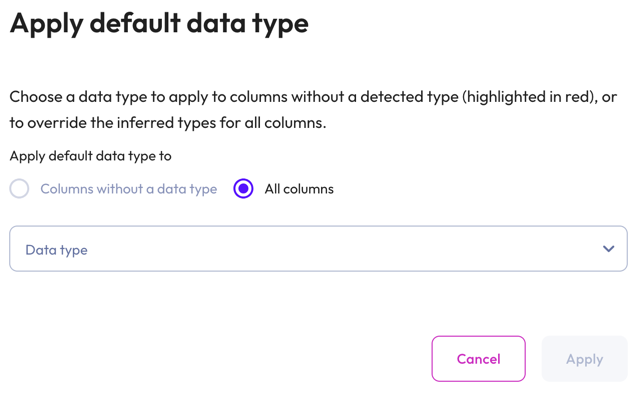
dashboard_customize Set default type: Apply a data type to columns without a detected type or override the inferred types for all columns.
- In the Apply default data type dialog, select Columns without a data type to apply a data type to columns without a detected type (these columns are highlighted in red). Select All columns to override the inferred types for all columns.
- Choose a data type from the data type drop-down menu.
-
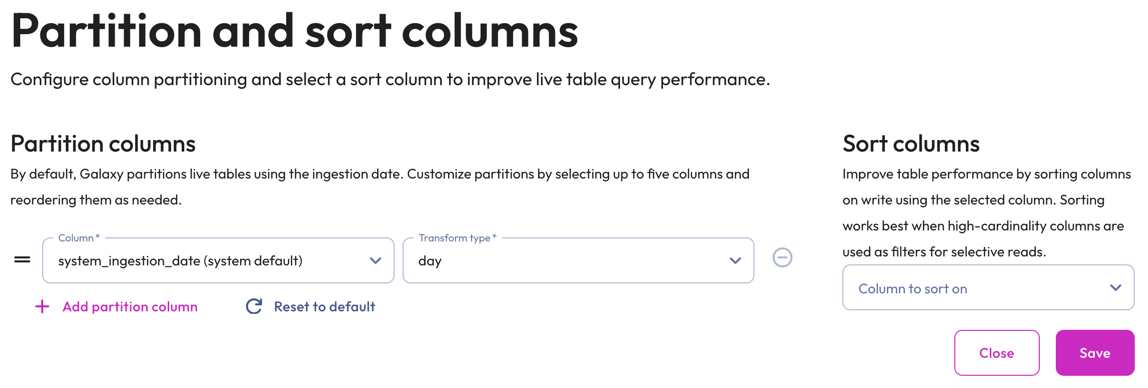
graph_2 Partition and sort columns: Customize partitions and sort columns.
-
In the Partition columns section, select a Column and Transform type from the respective drop-down menus. Transform types change depending on the column. For the bucket transform type, the number of buckets must be between 2 and 512.
Partitioning of
DOUBLEandREALcolumns is not supported. Change the data type to a supported column type.Partition changes are applied to new data immediately, while existing data is updated during the next compaction run.
Partition evolution is not supported.
- In the Sort columns section, choose a column from the drop-down menu.
- To add up to five partition columns, click addAdd partition column.
- To arrange columns, use the drag_handle handle to drag and drop.
- To delete added partitions and reset to the default partitions, click refreshReset to default.
- To remove a column, click do_not_disturb_on.
-
The Record sample panel shows the JSON message sample used to generate the columns. If your Kafka topic is new and does not have any messages for Galaxy to infer, you can manually enter a new JSON sample by clicking upload. Type or paste the new JSON sample in the text area then click Load sample.
The Table sample panel previews the mapped table.
To complete the configuration, click Create transform table.
Data ingest begins in approximately 1-2 minutes. You can run SELECT queries on
the live table like you would on any other table.
Transform Avro data #
To create a transform table for Avro data, select Avro.
-
In the Transform table target section:
- Select a Catalog and Schema from the respective drop-down menus.
- Provide a Table name and Description.
-
In the Schema registry section, perform the following steps to create a connection to a schema registery:
- Click add Connect schema registry.
- In the Name and description section, provide a Source name and a Description.
- In the Connection details section, provide the Schema registry URL, Access key, and Secret key.
- Click Validate schema registry. If the test fails, check your entries, correct any errors, and try again. If you see a success message, click Go back to return to the Create transform table dialog.
- Select a schema registry from the Schema registry drop-down
menu.
-
In the Table configuration section:
-
Set a data Retention threshold: By default, Retain forever is preselected to specify that all data is to be stored in the live table indefinitely. Select a different value to specify how long data is retained before it is automatically purged: 1 day, 7 days, 14 days, 30 days, or 90 days.
-
Choose an Error handling policy: Continue continues the ingestion process and writes any records that fail to parse to the errors table. Pause and notify stops the ingestion process if any parsing errors occur.
-
-
Click Validate data. If the test fails, check your entries, correct any errors, and try again.
-
Click Next.
Schematize Avro data #
As new schemas are registered in the schema registry, the live table schema is migrated automatically and fully managed, eliminating the need to manually modify the schema. To evolve data safely, see Avro schema guidelines.
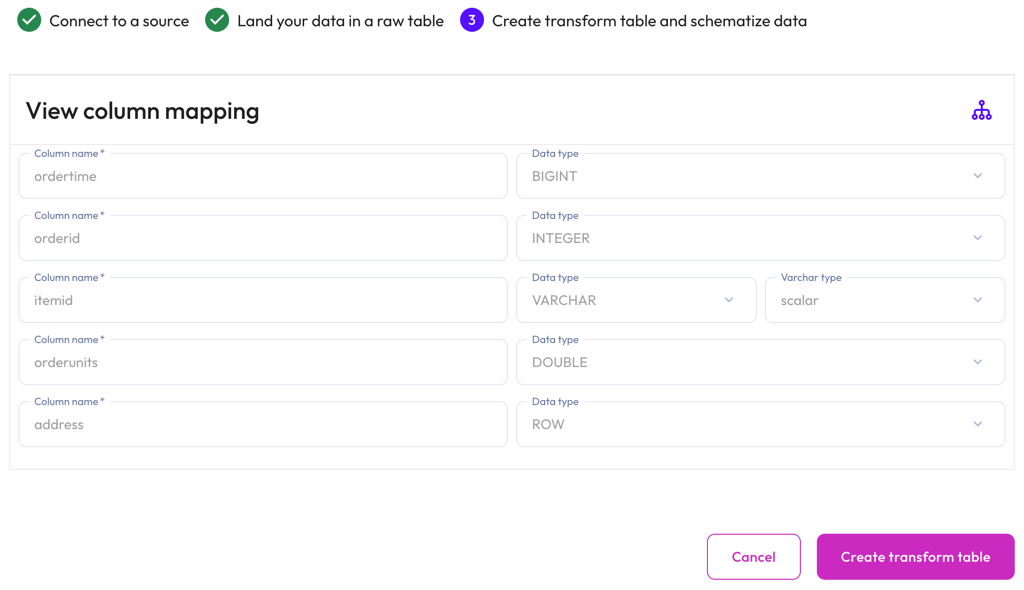
Starburst Galaxy automatically suggests a schema by inferring from the Kafka messages on the topic.
The View column mapping panel displays mapped data in the following columns:
- Column name: The column name for the live table.
- Data type: The data type for the live table column.
- Varchar type: The varchar type.
To customize partitions and sort columns, click graph_2 Partition
and sort columns, and perform the following steps:
-
In the Partition columns section, select a Column and Transform type from the respective drop-down menus. Transform types change depending on the column. For the bucket transform type, the number of buckets must be between 2 and 512.
Partitioning of
DOUBLEandREALcolumns is not supported. Change the data type to a supported column type.Partition changes are applied to new data immediately, while existing data is updated during the next compaction run.
Partition evolution is not supported.
- In the Sort columns section, choose a column from the drop-down menu.
- To add up to five partition columns, click addAdd partition column.
- To arrange columns, use the drag_handle handle to drag and drop.
- To delete added partitions and reset to the default partitions, click refreshReset to default.
- To remove a column, click do_not_disturb_on.
To complete the configuration, click Create transform table.
Data ingest begins in approximately 1-2 minutes. You can run SELECT queries on
the live table like you would on any other table.
Best practices #
Adhere to the following recommendations to ensure the best results when ingesting data with Kafka.
Throughput and sizing #
Galaxy can automatically scale with your throughput requirements. The number of Kafka partitions for a topic determines the number of pipes Starburst uses to ingest the data.
Pipes are a unit of compute used to ingest the data, and are mapped one-to-one with Kafka partitions.
You can increase ingestion throughput by adding more Kafka partitions. As more partitions are added, Galaxy automatically increases the number of pipes required to map to the Kafka partitions.
By default, a pipe has a Kafka read throughput limit of up to 8 MB/s per partition. The read throughput limit allows you to adjust the total throughput for a single partition. You can adjust the read throughput limit per partition to 1 MB/s, 2 MB/s, 4 MB/s, 8 MB/s or 16 MB/s. To increase the total throughout you can adjust the read throughput limit or increase the number of Kafka partitions.
When determining sizing, Starburst recommends setting the pipe read throughput limit to more than 50% of the Kafka per partition throughput. This headroom is not required, but is often used to handle spikes, and to backfill to prevent ingest lag.
For example, Starburst can ingest data from a topic with 20 partitions at a maximum rate of 160 MB/s when using the default Kafka read throughput limit of up to 8 MB/s per partition. In this case, we recommend configuring so that each partition produces data at no more than 4 MB/s.
Security #
Any modifications made to the data or metadata files may corrupt the Iceberg table. Starburst Galaxy cannot ingest to or manage data in a corrupted table.
- Recommended
-
- Apply the principles of least privilege to users who are granted permissions to perform operations on data in the S3 bucket where Iceberg tables are stored.
- Place Iceberg managed tables in a separate bucket with tighter AWS governance.
MSK policy for the cross-account IAM role #
When you create or configure a cross-account IAM role for MSK streams, the role must contain a policy that grants certain permissions. Use the example policy below to create or configure the cross-account role that you select in Galaxy to configure a connection.
    "Version": "2012-10-17",
    "Statement": [
        {
            "Effect": "Allow",
            "Action": [
                "kafka-cluster:Connect",
                "kafka-cluster:DescribeCluster",
                "kafka-cluster:DescribeClusterDynamicConfiguration",
                "kafka-cluster:DescribeGroup",
                "kafka-cluster:DescribeTopic",
                "kafka-cluster:DescribeTopicDynamicConfiguration",
                "kafka-cluster:DescribeTransactionalId",
                "kafka-cluster:ReadData"
            ],
            "Resource": [
                "arn:aws:kafka:<region>:<account-id>:cluster/<cluster-name>/*",
                "arn:aws:kafka:<region>:<account-id>:topic/*",
                "arn:aws:kafka:<region>:<account-id>:group/*"
            ]
        }
    ]
}
Avro schema guidelines #
The following sections provide detailed information on schema registry compatibility and evolution rules for Avro, as well as schema type mapping rules.
See schema registry docs for more information on schema evolution rules for Avro.
Schema compatibility #
Galaxy streaming ingest supports the following compatibility modes for Avro schemas:
| Compatibility mode | Fully supported | Partially supported |
|---|---|---|
| BACKWARD | check_circle | |
| BACKWARD_TRANSITIVE | check_circle | |
| FULL | check_circle | |
| FULL_TRANSITIVE | check_circle |
Schema evolutions #
The following schema evolutions are allowed:
- Adding a new column
- When adding a new column, the column must be optional with a default value to ensure backwards compatibility with older data.
- Type widening
-
int->longfloat->double- Required (no default) -> Optional (default of null). This change makes a previously required field optional by allowing it to be null. If the field is missing in a record, it defaults to null.
- Removing a field
- You can remove a field; however, removing a field, and later adding a field with the same name can result in collisions.
Schema mapping rules #
For an Avro schema registered in a schema registry, the root type must always be a record. The type must not contain any recursive references, as recursive types cannot be cleanly mapped to Iceberg.
| Avro | Iceberg |
|---|---|
boolean |
boolean |
double |
double |
float |
float |
int |
int |
long |
long |
bytes |
binary |
string |
string |
All non-null Avro primitive types are supported. The Avro null type is not
supported.
| Avro | Iceberg | Supported | Unsupported |
|---|---|---|---|
date |
date |
check_circle | |
decimal(p,s) |
decimal(p,s) |
check_circle | |
duration |
varbinary |
check_circle | |
local-timestamp-micros |
long |
check_circle | |
local-timestamp-millis |
long |
check_circle | |
time-micros |
time |
check_circle | |
time-millis |
time |
check_circle | |
timestamp-micros |
timestamptz |
check_circle | |
timestamp-millis |
timestamptz |
check_circle | |
uuid |
uuid |
check_circle |
Unsupported logical types get mapped to the primitive type.
| Avro | Iceberg | Notes |
|---|---|---|
record |
struct |
|
enum |
varchar |
|
array |
array |
|
map |
map |
|
union[T,null] |
T |
Only unions of null plus a single type are supported. Unions with more than two types are forbidden, as Iceberg only supports a single data type per column. |
fixed |
varbinary |
|
string |
string |
Limitations #
Apache Avro 1.12.0 introduced logical data types timestamp-nanos and
local-timestamp-nanos, which will fail the pipeline if used and are therefore
unsupported.
Next steps #
- View streaming data resources
- Manage streaming data resources
- View real-time streaming ingestion metrics in Amazon CloudWatch.
Is the information on this page helpful?
Yes
No