Table formats #
Starburst Galaxy supports the following object storage table formats, which are each described on separate pages:
In Starburst Galaxy, you do not connect to a table format’s catalog. Instead, you connect to a storage location, where Galaxy then reads from, and can write to any of the supported table formats listed above, as found in the same location. This feature is called Great Lakes connectivity.
Specify default table format #
For data consumers who want to read from any object storage file in any supported table format, there are no configuration steps or commands. Starburst Galaxy reads each file’s type and format from the object store’s associated metadata.
To check the format of a table, use the SHOW CREATE
TABLE SQL
statement and refer to the type property in the query result.
For data engineers who want to create new tables in an object storage catalog, Starburst Galaxy provides a simple way to specify the default format for all newly created tables.
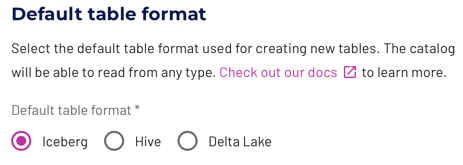
When creating a new catalog, select from one of the options in the Default table format dialog. Your selection applies only to newly created tables, and does not convert any existing tables.
You can also use a SQL statement to specify an individual table’s format when
creating that table. With a statement such as CREATE TABLE or
CREATE TABLE AS, specify the type parameter with iceberg, delta, or
hive as its argument. A table created this way can override the catalog’s
overall default table format. Examples are shown in the individual table format
pages listed above.
Table properties #
Each table format has its own set of properties that are supported by Great
Lakes connectivity as part of CREATE TABLE statements.
The following query lists the Starburst Galaxy table properties supported by Great Lakes connectivity:
SELECT * FROM system.metadata.table_properties;
Read more about the available table properties for each table format:
Great Lakes SQL support #
The SQL support with a catalog using Great Lakes connectivity depends partly on the table format in use, and on the format set as default for the catalog. The following additional details apply:
- Globally available statements are fully supported.
- Read operations are are fully supported.
- Data management support varies across table formats.
- Schema and table management support varies across table formats.
- Catalogs can use different table formats for different tables. This results in different SQL support and different metadata and storage options for different tables. See the individual table format pages listed above for details.
- View management is fully supported.
- Materialized view management automatically uses the Iceberg table format. This behavior is independent of the default table format of the catalog.
More specifics are available in the following sections about the different table formats, and their SQL support.
CREATE VIEW #
The CREATE VIEW statement creates a new view based on a
SELECT query. The view is a logical table
that can be referenced by future queries. Views do not contain any data.
Instead, the query stored by the view is executed every time the view is
referenced by another query.
Views in Starburst Galaxy can be used to pull together federated data across any catalog. Read more about federating multiple data sources in Starburst Galaxy.
The use of an OR REPLACE clause is optional and causes the view to be replaced
if it already exists, rather than raising an error.
The following examples show how to create a view:
Create a view:
CREATE VIEW view_name AS
SELECT col1, col2, col3
FROM table_name;
Create a view with a view comment:
CREATE VIEW view_with_comment
COMMENT 'This is a comment'
AS
SELECT col1, col2, col3
FROM table_name;
Create a view that summarizes the table_name table:
CREATE VIEW view_summary AS
SELECT col2, sum(col3) AS col_total
FROM table_name
GROUP BY col2;
Create a view replacing an existing view:
CREATE OR REPLACE VIEW view_name AS
SELECT col1, col2, col3
FROM table_name
In addition, Great Lakes connectivity also supports the following SQL statements for views:
Security for views #
There are two different security modes for table views, DEFINER and INVOKER.
The default security mode is DEFINER.
CREATE VIEW view_name
COMMENT 'this is a comment'
SECURITY DEFINER
AS
SELECT col1, col2
FROM table_name;
The DEFINER security mode allows the ability to restrict access to the
underlying tables that the user may not be allowed to access. Tables referenced
in the view are accessed using the permissions of the view owner (the creator or
definer of the view) rather than the user executing the query.
A view created in INVOKER security mode is a stored query. Tables referenced
in the view are accessed using the permissions of the user executing the query
(the invoker of the view).
CREATE MATERIALIZED VIEW #
Create and validate the definition of a new materialized view view_name of a
SELECT query. Run the REFRESH
MATERIALIZED
VIEW statement
after the creation to repopulate the materialized view with data. This
materialized view is a physical representation of the query results at the time
of refresh. The data is stored and can be referenced by future queries.
If the materialized view is made from an Iceberg table, it only gets refreshed if there are new snapshots in the underlying tables.
Create a simple materialized view view_name over the table_name that
only includes column_data_1:
CREATE MATERIALIZED VIEW catalog_name.schema_name.view_name
AS
SELECT column_data_1 FROM catalog_name.schema_name.table_name;
Read about the optional clauses and view additional usage examples for the CREATE MATERIALIZED VIEW SQL statement.
In addition, Great Lakes connectivity also supports the following SQL statements for materialized views:
CREATE SCHEMA #
The CREATE SCHEMA SQL statement creates a new, empty schema. A schema is a container that holds tables, views, and other database objects.
Create a new schema by using the default directory for the catalog or an
explicit LOCATION. The location of the schema must be retrievable through the
SHOW CREATE SCHEMA
statement. In addition, your active role
set
must have the location
privilege
for the intended location.
Assign location privileges by following these steps:
- Click Access control > Roles and privileges.
- Click the name of the role you want to change.
- Click Privileges > Add privilege > Location.
- In the Storage location name text field, enter the path of the location you want to use.
The following SQL statements are examples of creating a schema using the default
directory location and using an explicit LOCATION:
Create a new schema schema_name in the default location:
CREATE SCHEMA schema_name;
Create a new schema schema_name_location, with a set LOCATION to
s3://bucket-name/lakehouse/data/schema_name_location:
CREATE SCHEMA schema_name_location
  WITH (LOCATION = 's3://bucket-name/lakehouse/data/schema_name_location');
Create a new schema if it does not already exist.
CREATE SCHEMA IF NOT EXISTS schema_name;
Create a new schema schema_name, set the LOCATION property to
s3://bucket-name/lakehouse/data/schema_name_location and set the owner to
user_name:
CREATE SCHEMA schema_name AUTHORIZATION user_name
  WITH (LOCATION = 's3://bucket-name/lakehouse/data/schema_name_location');
View additional usage and clause examples for the CREATE SCHEMA SQL statement. In addition, the Great Lakes connectivity also supports the following SQL statements for schemas:
DROP SCHEMA #
The DROP SCHEMA SQL statement drops an existing schema that is empty.
Drop an empty schema:
DROP SCHEMA schema_name;
Use the CASCADE clause to drop all objects within a schema. For example, this
will drop tables, views, and materialized views.
Drop a non empty schema:
DROP SCHEMA schema_name CASCADE;
UNLOAD #
The UNLOAD SQL statement is a pre-built table
function within the system
schema that writes files directly to storage. The files that UNLOAD writes to
storage corresponds to what the input parameter selects.
This function does not support fault-tolerant clusters.
SELECT * FROM TABLE(system.unload(
 input => TABLE(...) [PARTITION BY col (, ...)],
 location => '',
 format => ''
 [, compression => '']
 [, separator => '']
 [, header => true|false]
))
input, location, and format parameters
are required. The compression, separator, and header parameters are optional. The input parameter can accept either a table name or a SELECT query. The
separator and header parameters are applicable only when the format
argument is set to CSV or TEXTFILE. See File formats
for more details.
Roles do not have access to the UNLOAD function by default. To enable role
access, users must have the UNLOAD function
privilege
on the catalog, as well as the corresponding location
privilege
on the object storage location where the output is written.
Examples #
To unload the orderkey, custkey, and orderstatus columns from the orders
table to the location s3://mybucket/my/unload/location in ORC file format:
SELECT
  *
FROM
  TABLE (
    system.unload (
      input => TABLE (
        SELECT
          orderkey,
          custkey,
          orderstatus
        FROM
          tpch.sf1.orders
      )
      PARTITION BY
        (orderstatus),
      location => 's3://mybucket/my/unload/location',
      format => 'ORC'
    )
  )
An example of UNLOAD using input => TABLE(tpch.sf1.orders):
SELECT
  *
FROM
  TABLE (
    system.unload (
      input => TABLE (tpch.sf1.orders)
      PARTITION BY
        (orderstatus),
      location => 's3://mybucket/my/unload/location',
      format => 'ORC'
    )
  )
An example of UNLOAD with multiple partitions:
SELECT
  *
FROM
  TABLE (
    system.unload (
      input => TABLE (
        SELECT
          orderkey,
          custkey,
          orderdate,
          orderstatus
        FROM
          tpch.sf1.orders
      )
      PARTITION BY
        (orderdate, orderstatus),
      location => 's3://mybucket/my/unload/location',
      format => 'TEXTFILE',
      compression => 'GZIP',
      separator => '|'
    )
  )
An example of UNLOAD with TEXTFILE format, a separator, and no compression:
SELECT
  *
FROM
  TABLE (
    system.unload (
      input => TABLE (
        SELECT
          orderkey,
          custkey,
          orderstatus
        FROM
          tpch.sf1.orders
      )
      PARTITION BY
        (orderstatus),
      location => 's3://mybucket/my/unload/location',
      format => 'TEXTFILE',
      separator => '|'
    )
  )
An example of UNLOAD with TEXTFILE format, a separator, compression, and
header:
SELECT
  *
FROM
  TABLE (
    system.unload (
      input => TABLE (
        SELECT
          orderkey,
          custkey,
          orderstatus
        FROM
          tpch.sf1.orders
      )
      PARTITION BY
        (orderstatus),
      location => 's3://mybucket/my/unload/location',
      format => 'TEXTFILE',
      compression => 'GZIP',
      separator => '|',
      header => true,
    )
  )
Supported parameters #
Supported format parameters:
- ORC
- PARQUET
- AVRO
- RCBINARY
- RCTEXT
- SEQUENCEFILE
- JSON
- OPENX_JSON
- TEXTFILE
- CSV
Supported compression parameters:
- NONE (default)
- SNAPPY
- LZ4
- ZSTD
- GZIP
Limitations #
Each format has its own set of constraints. The CSV format exclusively
supports VARCHAR columns, and AVRO files do not permit special characters in
the column names.
Session properties #
See shared session properties.
Is the information on this page helpful?
Yes
No