Microsoft Azure #
This page covers configuration from Azure to your Starburst Galaxy cluster.
In addition, read more about different connectivity configuration support for Azure.
Azure service principals #
When configuring a catalog for Azure Data Lake Storage (ADLS), you must specify one of two ways to authenticate your Starburst Galaxy account’s access to your ADLS account. You can specify either an Azure access key or an Azure service principal.
Using an Azure service principal is more secure than using access keys, and is often the only allowed method to authenticate to data sources. Use the Azure service principal to authenticate your access to data in an ADLS account, with the metadata in a Hive metastore or Starburst Galaxy’s own metastore.
In Starburst Galaxy, you can define an Azure service principal once, giving that service principal an alias, and then use the alias in multiple ADLS catalogs. Starburst Galaxy stores the alias in your account for reuse.
Use the following steps to configure an Azure service principal and its alias:
-
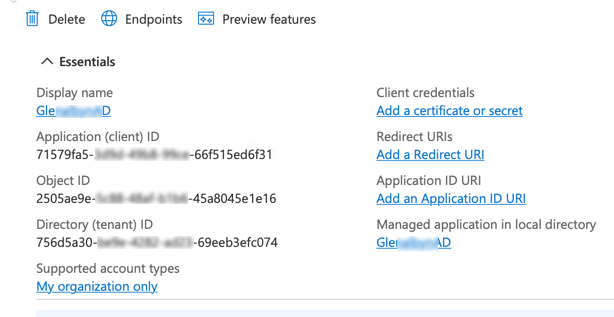
Configure a service principal in your Azure console, and preserve the IDs shown in the App registrations Essentials screen like the following example. Alternatively, request these IDs from your network administrator.
-
In Starburst Galaxy, navigate to the Account section of the left-side menu.
-
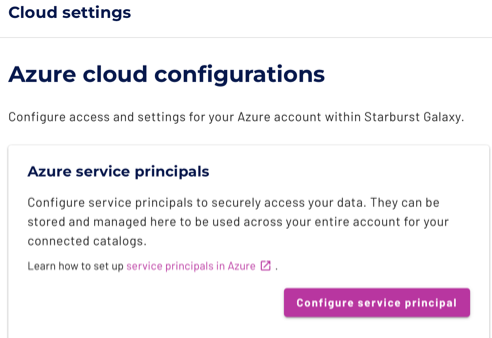
Expand the Admin > Cloud Settings menu, and select the Azure tab.
-
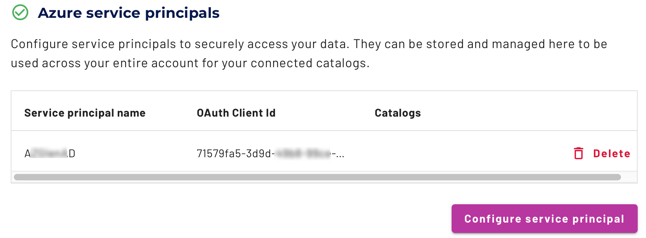
In the Azure service principals pane, click Configure service principal.
-
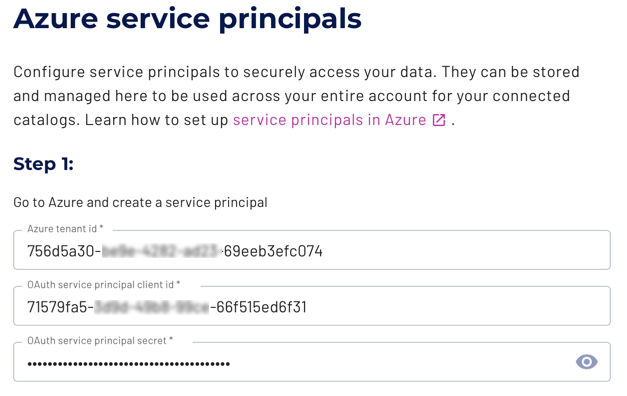
For Step 1:
a. From Essentials, copy the Directory (tenant) ID to the Azure tenant id field.
b. From Essentials, copy the Application (client) ID to the OAuth service principal client id field.
c. Under Essentials, then Client Credentials, click the n certificate, n secret link. Create a new client secret and copy its Value to the Oauth service principal secret field. (You can only see the value for a newly created secret. Do not copy the Secret ID.)
-
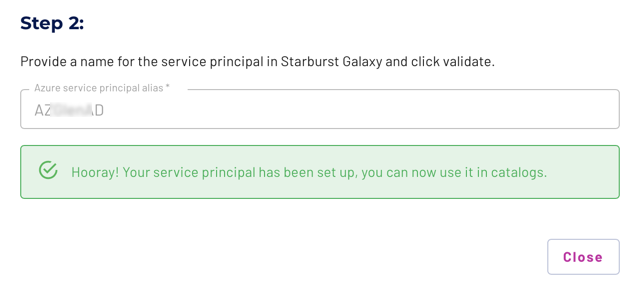
For Step 2, provide a Starburst Galaxy-internal name in the Azure service principal alias field. This value displays in the list of service principals, as well as in the selection dialog in the catalog configuration.

-
Click Validate Azure service principal. Starburst Galaxy sends the IDs provided in Step 1 to your Azure account, returning a success message if the IDs validate. If validation fails, double-check the IDs you entered, or contact your site’s network administrators, and try again.
-
The new service principal is now configured in your Starburst Galaxy account.
-
Click Close. Your new service principal is now listed in the Azure service principals list, and is ready to use in your ADLS catalog.
SSH tunnels #
Securely connect to private data sources using an SSH tunnel through a bastion host.
Learn how to set up an SSH tunnel.
Is the information on this page helpful?
Yes
No