DBeaver #
The open source tool DBeaver Community is a powerful SQL editor and universal database tool. It is installed as a local application on your workstation. You can use DBeaver with the JDBC driver to access Starburst Galaxy, Starburst Enterprise platform (SEP), and Trino clusters.
The same setup steps apply to the commercial versions of DBeaver.
Requirements #
Users of Starburst Galaxy and Starburst Enterprise 354-e or newer, must use DBeaver 21.0 or newer.
Connection #
Use the following steps to prepare DBeaver to access your cluster:
-
Get the necessary connection information for your cluster.
-
In Dbeaver, click the plug icon in the upper left corner of the application window, and select New database collection.
-
Enter
trinoin the search field. Select the Trino logo, and click Next.
-
In the Main tab of the Connect to a database dialog:
a. The initial configuration is set for a server running at
localhost:8080with no security settings.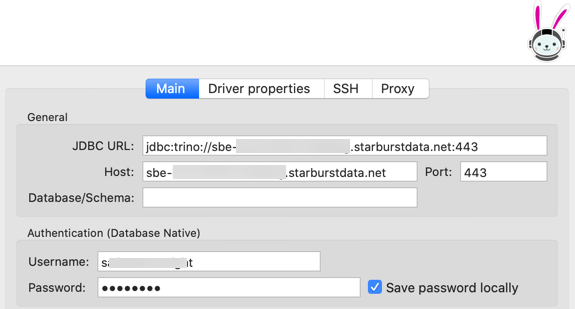
b. The JDBC URL field is constructed automatically. Do not write in this field.
c. In the Host field, enter the full URL of your cluster.
d. In the Port field, enter the port on which your cluster is listening for connections. Use 443 for Starburst Galaxy. For SEP clusters, you must fill in a port number, which your network administrator can provide, or enter one of the default ports.
e. For your initial connection test, do not use the Database/Schema field. You can come back later to narrow this connection entry to open a particular database among those managed by your cluster.
f. In the Username field, for a cluster without security, enter any name. For a TLS-enabled cluster, enter a valid username for the authentication type in use on your cluster, such as LDAP. Starburst Galaxy provides the correct value in the User field in the connection info dialog.
g. In the Password field, leave blank for a cluster without security. For a TLS-enabled cluster, enter the valid password for the username entered.
-
For a TLS-enabled cluster, continue into the Driver properties tab.
If the JDBC driver is not already installed, a dialog opens showing the latest available JDBC driver. Select that line item, and click Download to download the latest driver and populate the window with driver properties and values.
a. In the properties list, click SSL
b. Expand the drop-down menu, and select
true. -
Click Test Connection.
-
The connection test continues. Look for a success dialog like the following:
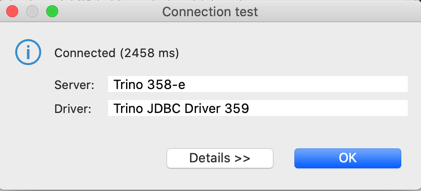
If you instead receive an error dialog, go back through your settings or try different port numbers. Make sure you are using the exact connection information provided by your network administrator.
Note: If you encounter an error stating “Session properties cannot be overridden once a transaction is active”, enable Auto-commit. You can find this setting on the Edit connection menu under Connection settings > Initialization. -
After a successful test, click Finish. This places an entry for this connection in the Database Navigator panel. Open this entry to connect to the cluster and see a list of its catalogs.
Note: You can select the new entry, right-click, and select Rename to give this connection your preferred name.
TLS/HTTPS #
Starburst Galaxy uses globally trusted certificates, so the host and port provided by the connection dialog are sufficient.
If you’re using globally trusted certificate best practices, use the cluster’s HTTPS URL in the connection string as shown in the previous steps.
If you’re not using a globally trusted certificate, you may have to configure the trust store on your client machine. Consult your site’s network administrators for guidance.
To use TLS/HTTPS, specify the JDBC property
setting SSL=true as shown in the previous steps. As an alternative, you can
make the same setting appended to the JDBC connection string in the form
?SSL=true.
External authentication #
Connect to your cluster with external authentication.
For SEP clusters:
Any SEP cluster that requires authentication is also required to
use TLS/HTTPS. Set the SSL and externalAuthentication JDBC properties to
true.
For Galaxy clusters:
Set the externalAuthentication JDBC property to true. For the roles
property value, enter the role that owns the cluster using the syntax:
system:<owning-role>.
Querying #
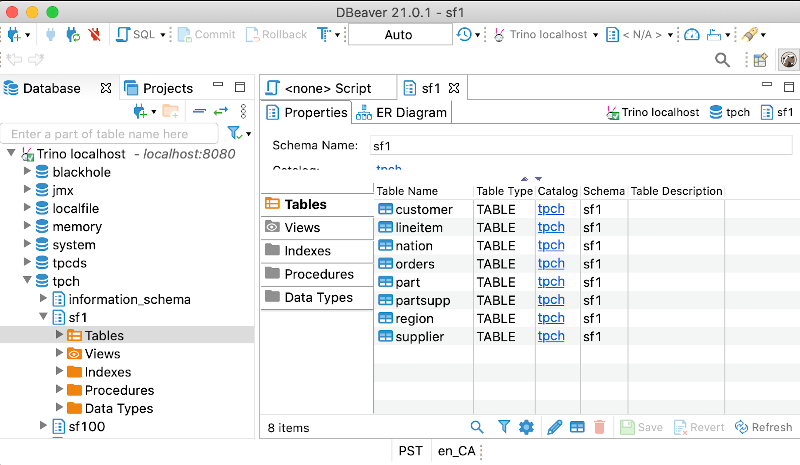
Click on the defined connection in the Database Navigator to connect. The initial connection downloads all metadata about catalogs, schema, tables, columns and more. You can browse the information as it loads.
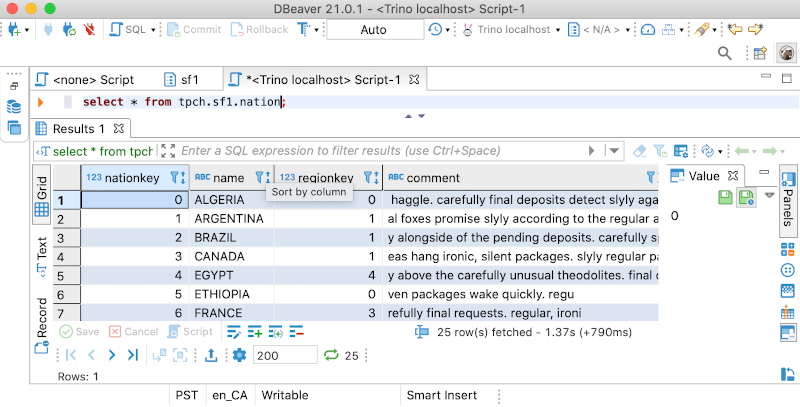
Open SQL Editor > Open SQL script (or press F3) to write and execute your queries and inspect the returned results.
Configure for OAuth 2.0 #
The default DBeaver configuration works well for password-based authentication types, such as LDAP. But when using an OAuth 2.0 compliant authentication type such as Okta or Ping Identity, every new connection to an SEP cluster might result in another browser pop-up confirming that you are authenticated or even requesting re-authentication.
To avoid these pop-ups, configure DBeaver with the following additional settings in DBeaver Preferences.
In Preferences > Editors > SQL Editor, in the Connections section, set Open separate connection for each editor to NEVER. Clear both checkboxes.

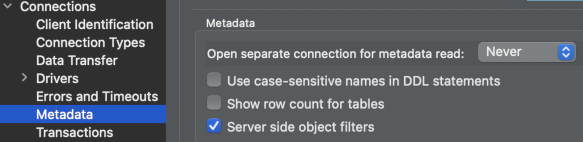
In Preferences > Connections > Metadata, set Open separate connection for metadata read to NEVER.
Is the information on this page helpful?
Yes
No