Installing Starburst Enterprise in AWS#
Note
As of 474-e, the AWS CloudFormation Template (CFT) deployment method is deprecated and will be removed in a future release. Support will continue through May 2026. Starburst recommends that you migrate to an alternative deployment method, such as Amazon EKS, prior to May 2026. Contact your Starburst account team with questions or feedback.
Now that you have satisfied the all the requirements you are ready to proceed with installing Starburst Enterprise platform (SEP) in AWS.
License and resources#
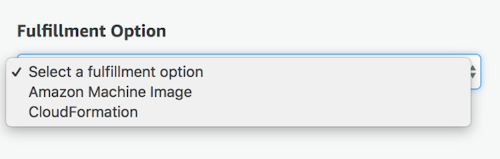
SEP is available as an Amazon Machine Image (AMI), which in turn is used in the CloudFormation template (CFT). You can get the resources directly from Starburst.
You can use the EC2 console or AWS CLI to deploy a SEP cluster with the CloudFormation template.
If you use SEP’s CFT and a privately shared SEP AMI, you must get the license and configure the S3 URI in the CFT to enable additional enterprise features.
Deploy a cluster with the EC2 console#
1. Select template
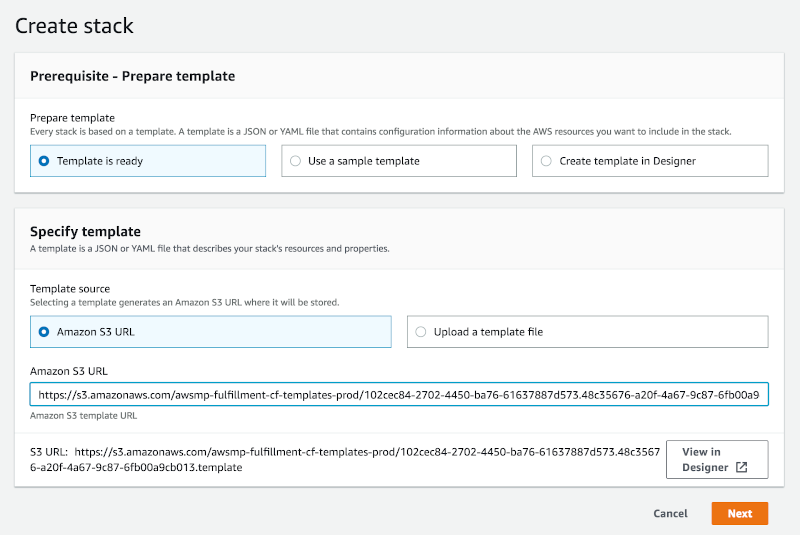
After you receive the URL to the CFT, you are able to begin configuring and launching your cluster.
This directs you to the Select Template step for creating a CloudFormation stack. Find the pre-populated field under Amazon S3 template URL. This is the location of Starburst’s SEP CloudFormation template. Click Next.
Optionally you can choose Copy to Service Catalog for when using with the AWS Service Catalog.
2. Specify details
Specify the details of your cluster defined by the CFT configuration parameters. This step includes network, EC2 and SEP and other configuration options.
Field |
Description |
|---|---|
Preliminary details |
Provide a name for your stack that allows you to distinguish it from other stacks running in your AWS account. For example, “sepcluster”. |
Network configuration |
Specify the network configuration parameters. They are typically preconfigured. See the VPC and VPC subnets and Security groups sections for more detail. |
EC2 configuration |
Specify the EC2 configuration parameters.
Note that you need to ensure a volume is mounted and configured on each
worker, with the |
SEP configuration |
Specify the SEP configuration parameters. |
Hive connector options |
Specify the relevant Hive connector options if you plan to query data in HDFS or S3. |
Ranger options and Ranger LDAP user synchronization |
These options allow you to configure Apache Ranger for the system level security with Apache Ranger and the related synchronization with an LDAP backend for user and group information. More information is available in the table of parameters. |
Advanced AWS S3 configuration |
Optionally configure the parameters to access custom S3 or S3-compatible systems. |
Monitoring |
Indicate if you want to enable integration with CloudWatch metrics. |
IAM Instance |
Optionally specify the IAM InstanceProfile. |
Other |
Indicate whether you are deploying and using Apache Superset and other configuration. |
3. Options
Enter any additional stack specifications as shown on the Options page. These options include adding tags to resources within your cluster, choosing IAM roles, and specifying monitoring time for rollback triggers, among other advanced specifications. More information can be found in the AWS CloudFormation documentation.
4. Review
Finally, review the details of your SEP cluster. When content, proceed by pressing create to conclude the creation.
Note
Just above the final “Create stack” button there is a blueish box informing you that The following resource(s) require capabilities: [AWS::IAM::Role]. In order to create the Stack you need to mark the checkbox next to I acknowledge that AWS CloudFormation might create IAM resources.
Deploying a cluster with the AWS CLI#
You can deploy an SEP cluster using the AWS CLI instead of the AWS Web Console. Ensure that the AWS CLI is installed and configured before you proceed.
1. Edit script file
Open a terminal window and create a script file. This file will contain a long list of properties for the CFT, so separate each segment with a backslash to make the script easier to read and write. Refer to the example script below for sample formatting.
2. Create stack
Add a first line to the command that uses the AWS CLI to create a CloudFormation stack.
aws cloudformation create-stack \
3. Name stack
Specify the name that is to be associated with the cluster. The name must be unique in the region in which you are creating the cluster.
--stack-name exampleclustername \
4. Specify template
Add the CFT template URL you received. The URL must point to a template that is located in an Amazon S3 bucket.
--template-url https://s3.amazonaws.com/example-context/TrinoCFT.template \
5. Specify parameters
Define a list of parameter structures that specify input parameters for the cluster. Refer to the complete list of parameters in the configuration section Parameter values need to be provided on the command line in special form. Refer to the example below for guidance.
6. Configure rollback options
Configure the rollback ability as desired to disable rollback of the cluster if stack creation fails, with one of the following options:
--disable-rollback \
--no-disable-rollback \
RollbackTriggers=[{Arn=string,Type=string},{Arn=string,Type=string}],MonitoringTimeInMinutes=integer
7. IAM capabilities acknowledgement
Analogous to how you mark the I acknowledge that AWS CloudFormation might
create IAM resources. checkbox, when deploying SEP via the AWS console,
you need to denote that you accept this capability when deploying with the
CLI. This is done by adding a --capabilities parameter to the AWS CLI
create-stack command.
--capabilities CAPABILITY_IAM \
8. Review
Finally, review the details of your cluster and your command. When ready, save and run the script file to create your cluster.
Example CFT creation script#
The following example shows a full command to create a cluster with the AWS CLI:
aws cloudformation create-stack \
--stack-name "SEP-cluster" \
--template-url "https://s3.amazonaws.com/awsmp-fulfillment-cf-templates-prod/StarburstCFT.template" \
--parameters \
"ParameterKey=VPC,ParameterValue=vpc-4bd6ca11" \
"ParameterKey=Subnet,ParameterValue=subnet-123abc2b" \
"ParameterKey=SecurityGroups,ParameterValue=sg-12e34aeb" \
"ParameterKey=CoordinatorInstanceType,ParameterValue=r4.xlarge" \
"ParameterKey=WorkersInstanceType,ParameterValue=r4.xlarge" \
"ParameterKey=KeyName,ParameterValue=john.smith" \
"ParameterKey=IamInstanceProfile,ParameterValue=my-ec2-instance-profile" \
"ParameterKey=WorkersCount,ParameterValue=2" \
"ParameterKey=LaunchSuperset,ParameterValue=yes" \
"ParameterKey=MetastoreType,ParameterValue='External MySQL RDBS'" \
"ParameterKey=ExternalMetastoreHost,ParameterValue=172.31.6.18"  \
"ParameterKey=ExternalMetastorePort,ParameterValue=3306"  \
"ParameterKey=ExternalRdbmsMetastoreUserName,ParameterValue=hive"  \
"ParameterKey=ExternalRdbmsMetastorePassword,ParameterValue='q@55vv0r|>'"  \
"ParameterKey=ExternalRdbmsMetastoreDatabaseName,ParameterValue=hive_metastore"  \
"ParameterKey=AdditionalCoordinatorConfigurationURI,ParameterValue=s3://my_bucket/starburst-additional-coordinator-configuration-1.0.zip" \
"ParameterKey=AdditionalWorkersConfigurationURI,ParameterValue=s3://my_bucket/starburst-additional-workers-configuration-1.0.zip" \
"ParameterKey=BootstrapScriptURI,ParameterValue=s3://my_bucket/starburst-bootstrap-1.0.sh" \
"ParameterKey=LicenseURI,ParameterValue=s3://my_bucket/starburstdata.license" \
"ParameterKey=S3Endpoint,ParameterValue=https://mybucket.s3-us-west-2.amazonaws.com" \
"ParameterKey=S3AccessKey,ParameterValue=AKIAIOSFODNN7EXAMPLE" \
"ParameterKey=S3SecretKey,ParameterValue=wJalrXUtnFEMI/K7MDENG/bPxRfiCYEXAMPLEKEY" \
--capabilities CAPABILITY_IAM
The above commands yields output like the following:
{
  "StackId":"arn:aws:cloudformation:us-east-1:123456789012:stack/myteststack/466df9e0-0dff-08e3-8e2f-5088487c4896"
}
Write a bootstrap script#
Bootstrap scripts are a powerful tool that can streamline cluster provisioning and maintenance. Commonly, these scripts are used to:
Download and place plugin resources such as additional connectors or UDFs
Modify the node’s filesystem with additional directories
Place SEP configuration files that are not handled via the
AdditionalCoordinatorConfigurationURIandAdditionalWorkersConfigurationURICFT parameters
The following example demonstrates a coordinator node check followed by a coordinator-specific modification. Then, the script downloads a plugin resource and creates a directory.
#!/usr/bin/env bash
if [[ "$1" == "coordinator" ]]; then
  echo "io.trino.security=DEBUG" >> /usr/lib/starburst/etc/log.properties
fi

sudo aws s3 cp s3://mybucket/starburst/config/json-serde-jar-with-dependencies.jar /usr/lib/starburst/plugin/hive/

sudo mkdir -p /var/log/starburst/dev/
The following steps are necessary to use a script:
Write the script as desired
Place the script file in an S3 bucket
Set the
BootstrapScriptURIparameter to the correct S3 path of the file
The bootstrap script is executed on all nodes after instance provisioning, but before starting SEP.
A best practice is to update the name of the file with a version, an enumerator or a date value with each change.
Expose secrets to SEP#
You can expose secrets such as usernames and password to SEP by using environment variables.
The AWS secrets manager (ASM) stores and manages secrets.
Create a secrets document in ASM using the following format:
{
  "secrets": [
    {
      "name": "secretName0",
      "value": "secretValue0",
      "description": "secretDescription0"
    },
    {
      "name": "secretName1",
      "value": "secretValue1",
      "description": "secretDescription1"
    },
  ]
}
Write a small script to retrieve the file from ASM, extract the secrets and expose them as environment variables.
#!/usr/bin/env bash
# A simple script utilizing the AWS CLI v2 and ASM
#
# $1 = id of the secret in ASM, which is a JSON document
#

aws secretsmanager get-secret-value \
--secret-id ${1} \
--query SecretString --output text | \
jq -r '.secrets[] | "export " + .name + "=\"" + .value + "\""'
The script produces the following output with the above secrets file.
export secretName0=secretValue0
export secretName1=secretValue1
Embed the commands from the script into a bootstrap script. Ensure that your EC2 machines are granted access to ASM and run it within the same region.
As a result, your secrets are exposed as environment variables and can therefore be used in catalog files and wherever else you want to use secrets.
You can also use the script manually for testing. Call the script, named
$HOME/bin/secrets-as-envars in this example, directly or from a shell
startup script, such as $HOME/.bashrc:
eval $($HOME/bin/secrets-as-envars)
Uninstalling SEP#
Deleting a cluster on the AWS CloudFormation console#
- 1. Select the stack
From the list of clusters (CloudFormation stacks) within the AWS CloudFormation Console, select the cluster you intend to uninstall. Note that the cluster must currently be running in order to delete it.
- 2. Actions menu
Navigate to the Actions drop down menu and click Delete stack.
- 3. Confirm the delete action
When prompted with the option to confirm or cancel the delete request, click Yes, Delete to proceed with the uninstallation of your SEP cluster.
Once stack deletion has begun, you cannot terminate the process. The cluster
proceeds to the DELETE_IN_PROGRESS state. After the cluster deletion is
complete, the cluster is in the DELETE_COMPLETE state. Clusters in the
DELETE_COMPLETE state are not displayed in the AWS CloudFormation console by
default. To display deleted clusters, you must change the stack view setting. If
the deletion fails, the cluster is in the DELETE_FAILED state.
For information on how to fix failed delete actions on the AWS CloudFormation Console, navigate to the DELETE STACK FAILS section within the AWS CloudFormation troubleshooting documentation.
Deleting a cluster in the AWS CLI#
To delete a cluster within the AWS CLI, you must run the AWS CloudFormation
delete-stack command. This process requires you to identify the name of
the stack you intend to delete.
Note
When you delete an SEP cluster, you delete the entire cluster and all of its resources. Moreover, you can not delete a cluster in which termination protection is enabled.
Reference the following example:
aws cloudformation delete-stack --stack-name mystarburststack
Safeguarding your cluster#
You can prevent your cluster from being accidentally deleted by enabling termination protection. See safeguarding your stacks.